Hey there.
I have planning to set up a home server for a long time. A couple of days ago I did it. Today I want to talk about what I bought and what I did after.
I bought Techstorm Gpx Intel Core I7 1360P 16GB DDR5 Ram 500GB SSD Windows 11 Pro Mini Pc.

Techstorm is a Turkish company I believe. I am saying I believe this because I could not find that much information online about Techstorm.
Anyway, you can see the specs, they look pretty impressive. Why I am saying this because usually, Mini PCs on the market do not have up-to-date hardware. It came with Windows 11 installed. I set up my accounts on that. I installed the Ubuntu 22.04 server version as Dual Boot. About Ubuntu see here, and about Linux see here. Dual boot means, I can install 2 operating systems to one pc, and I can choose one of them on booting. I will say server for my PC. Because it will be a server for my home. Usually, people say home server or home lab.
My server is going to stay somewhere at home without connecting a display or keyboard. So, I will connect to the server via SSH. About SSH see here. Since my modem uses DHCP, I reserved the current IP address in modem: 192.168.xxx.xxx
All right, why a home server? I have a couple of reasons:
- I want to learn more about Linux and system administration. Of course, I can learn Linux without buying a new PC. But, a playground is not didactic as much as daily usage.
- I want to have a central storage point in my home to store photos, videos, contacts, and documents. Anything in our phones and our computers that I don’t want to lose.
- I want to try some of my projects like production, kind of toy.
Now, let’s talk about what I installed on my server. On the fresh install, you will need to update package repositories and upgrade. That was what I did. Then I installed Docker and configured it. About docker see here.
Let’s say I ran a docker container for my photo app on port 8888 and my music app on port 9999. And I want to access my photo app using myphotoapp.myserver.com and my music app using mymusicapp.myserver.com. For that, I need to configure myphotoapp.myserver.com to point to port 8888, mymusicapp.myserver.com to point to port 9999.
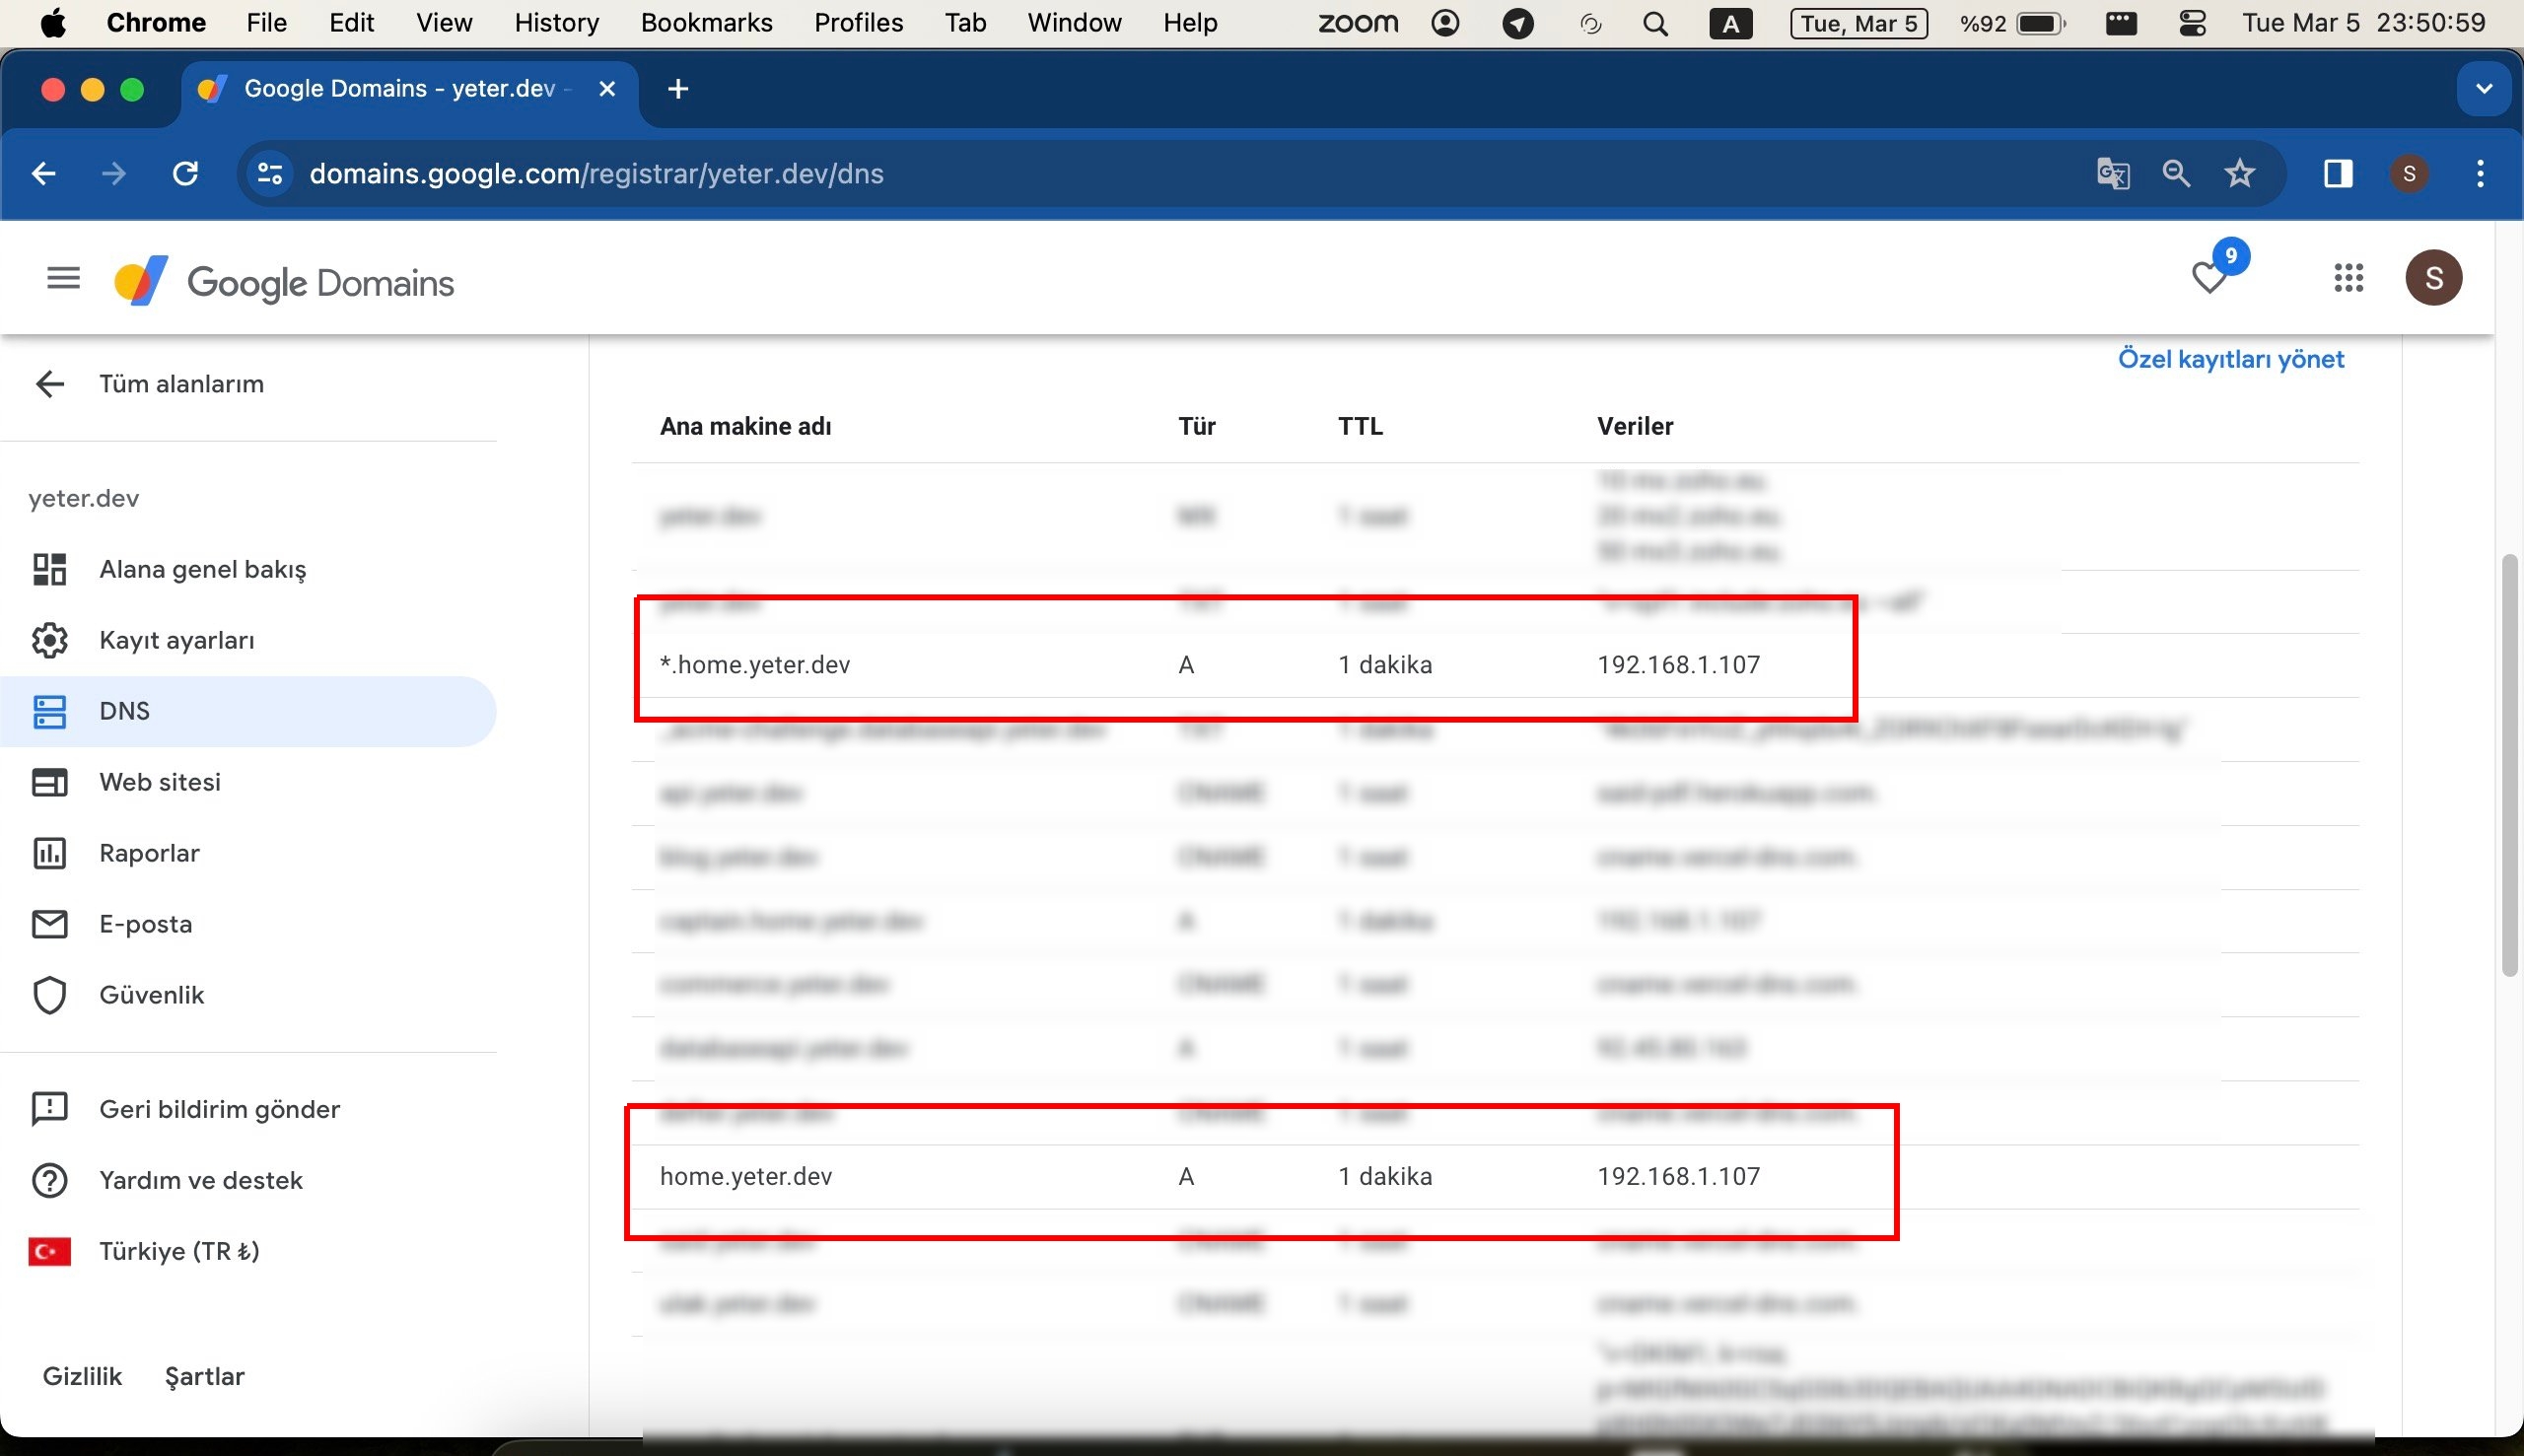
I don’t have a public static IP but nothing stops me from assigning a domain to my internal ip 192.168.xxx.xxx on my domain registrar.
I took my domains from the Google Domains service a couple of years ago. Squarespace acquired all domain registrations and their associated customer accounts from Google Domains. About more, see here.
But, I still can configure DNS records from it. I created two A records pointing to my internal IP.
I installed Nginx Proxy Manager instead of directly Nginx. Because it has a very handy UI to manage all configurations. Most importantly it has built-in Let’s Encrypt support. About Let’s Encrypt see here. Let’s Encrypt is going to provide free SSL certificates.
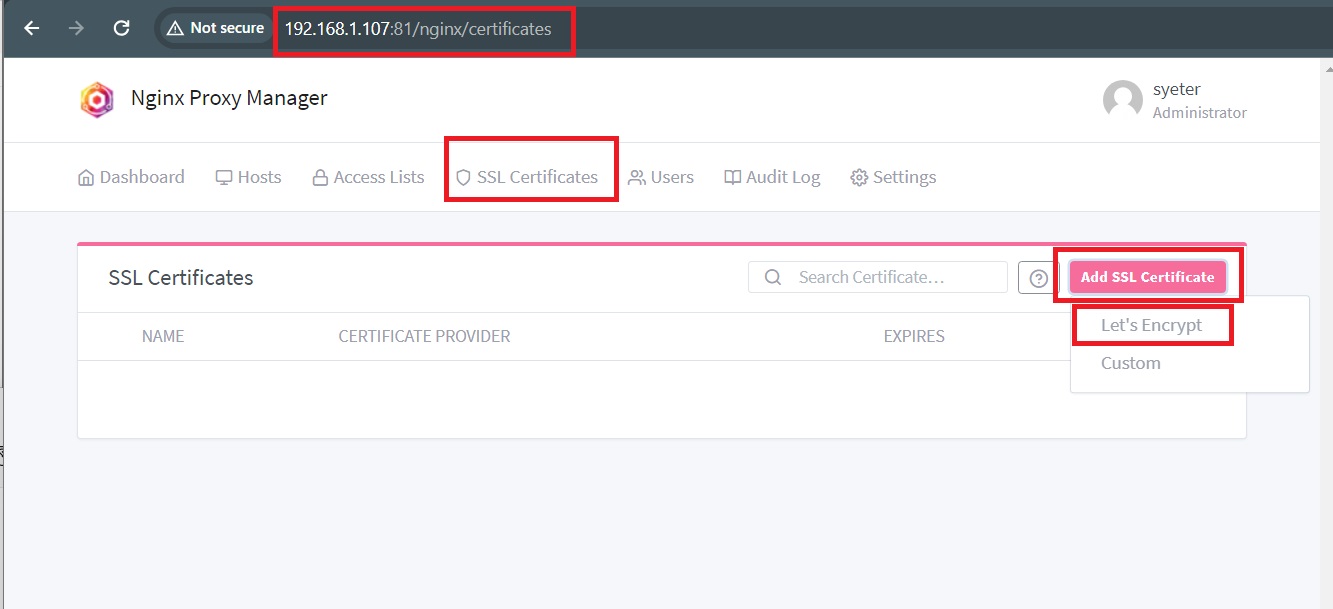
Then I opened the Nginx Proxy Manager by going to http://192.168.1.107:81, went to the SSL Certificates tab, clicked the Add SSL Certificate button, and selected Let's Encrypt
Then I configured all the details for a new certificate like below:
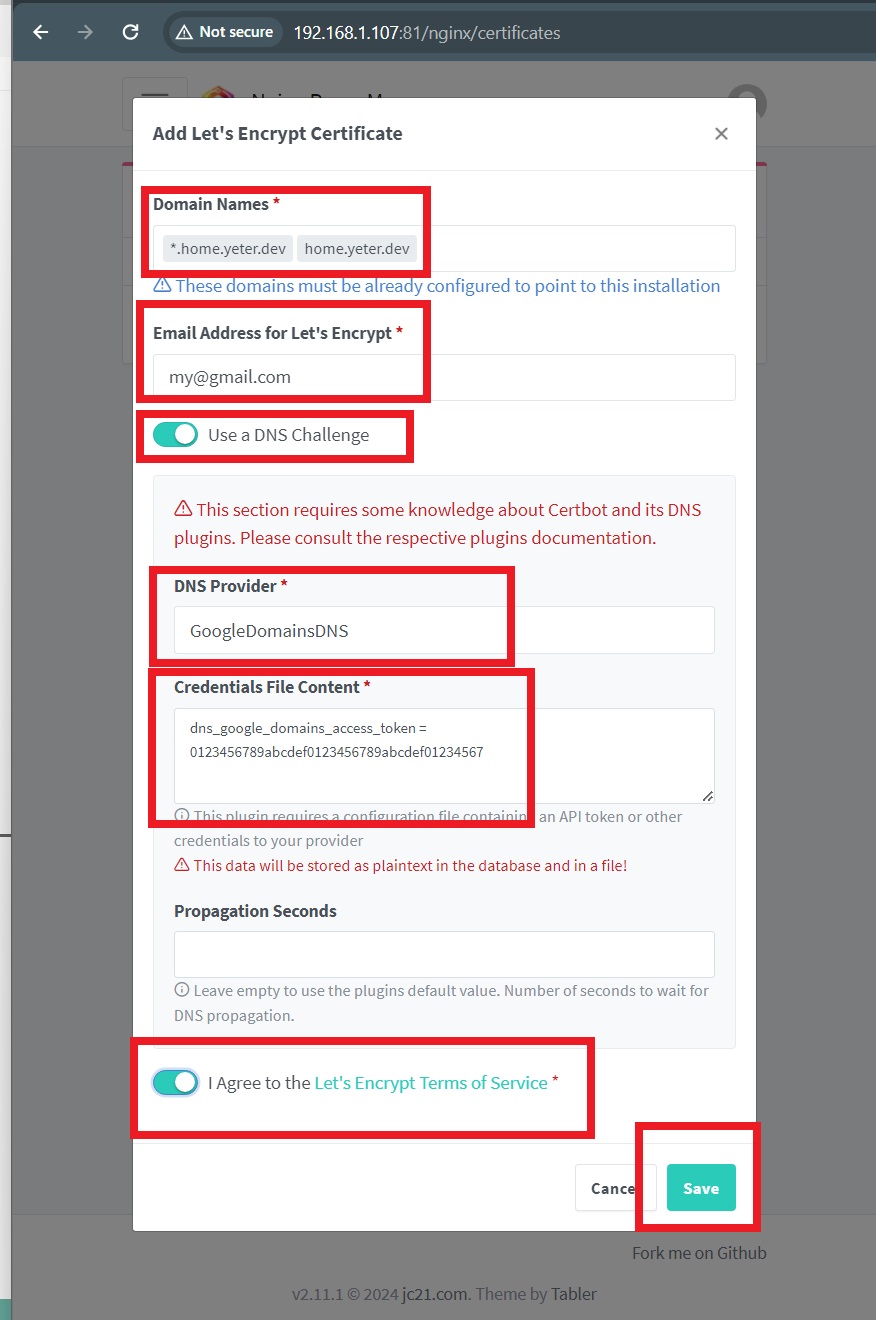
I added domain names that I just configured in my Google Domains dashboard. Then added an email address for Let's Encrypt. Then I switched on Use a DNS Challenge. I chose GoogleDomainsDNS as a DNS provider. Then I got an access token from the security section in my Google Domains dashboard and pasted it here. And accepted the terms and saved it.
On first time it gave me an error, so I changed Propagation Seconds to 120 seconds. Then it was saved.
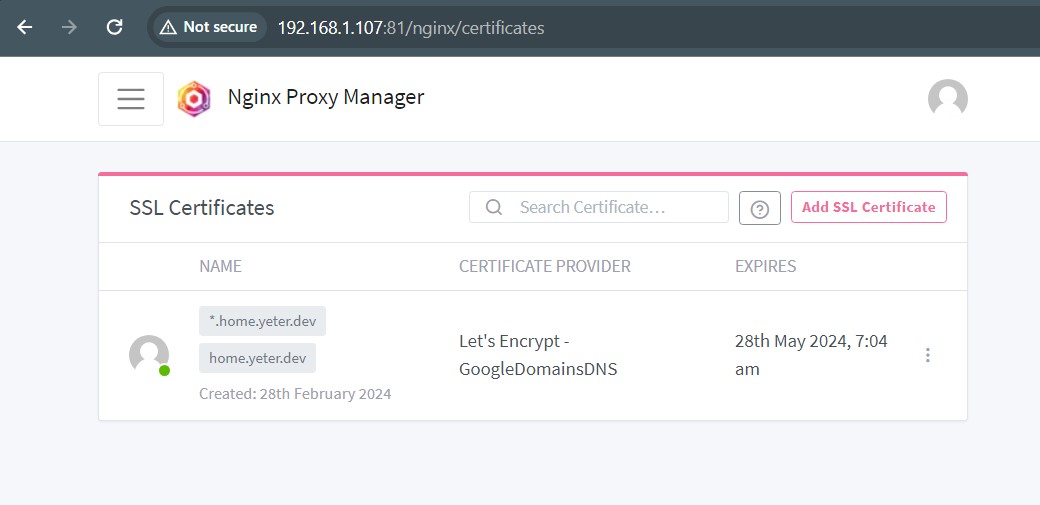
Good, we have a valid SSL cert, so let’s use it.
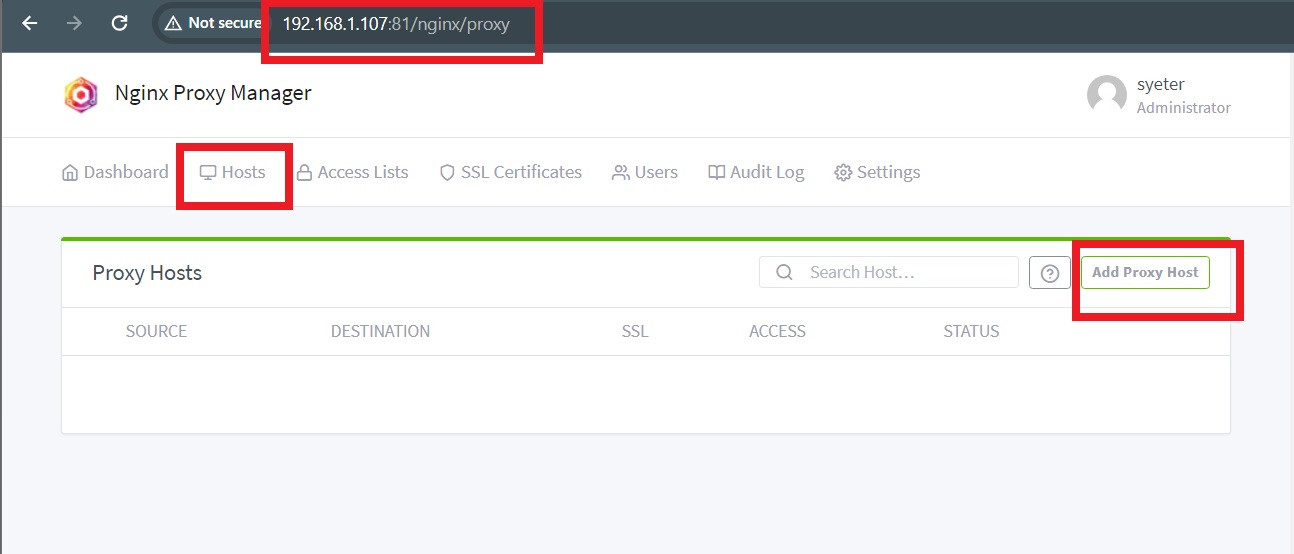
To do that, I opened Hosts > Proxy Hosts and clicked on the Add Proxy Host button.
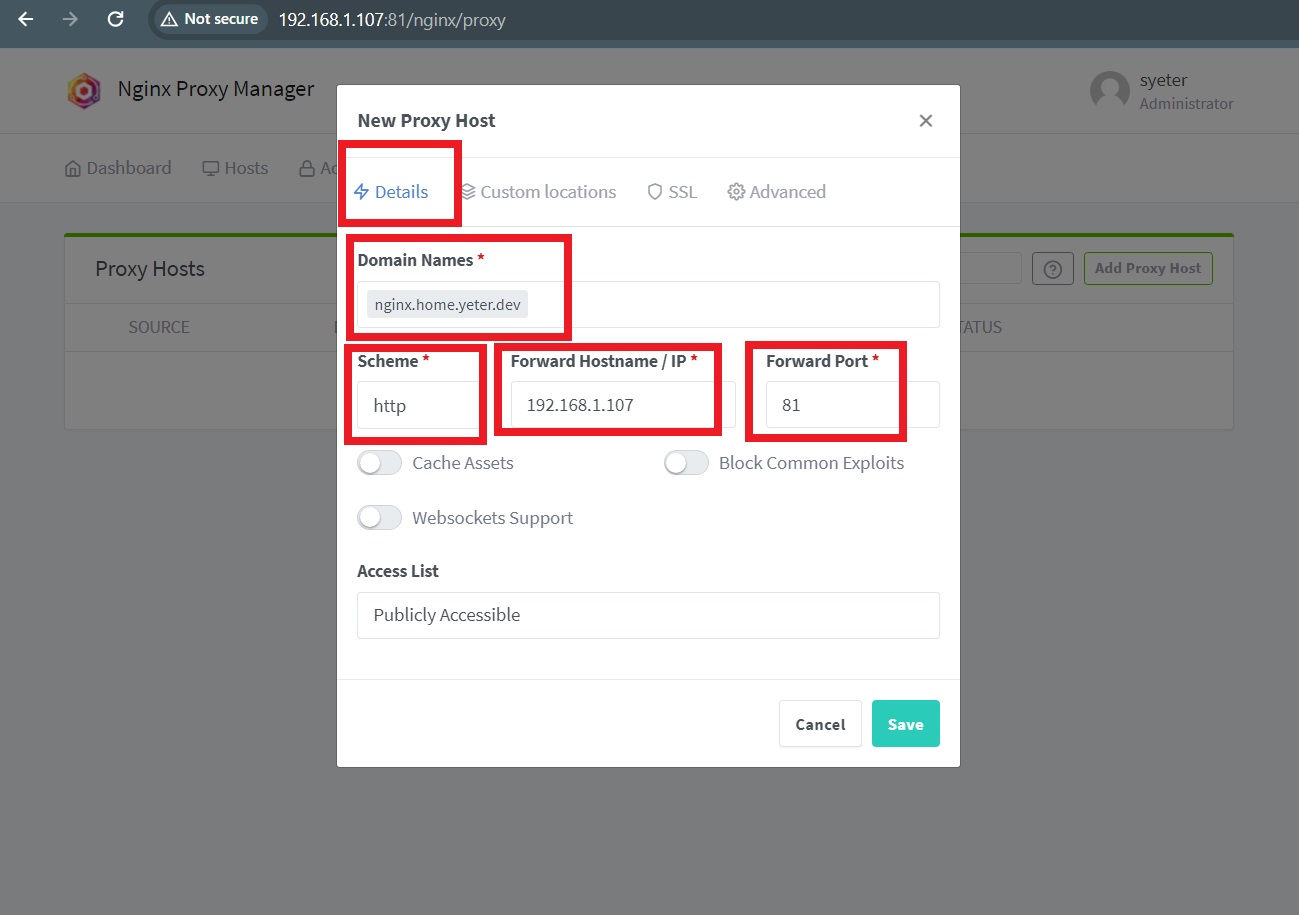
In the details tab, I added a new domain name: nginx.home.yeter.dev. Since I created an SSL certificate for the wildcard domain name *.home.yeter.dev I can use any name that ends with .home.yeter.dev. Also, I can add multiple domain names as many as I want.
The Scheme is http because the nginx proxy manager ui uses HTTP inside the docker container. I added my home server IP address: 192.168.1.107 and I added the port that the nginx proxy manager ui uses.
In the SSL tab, I chose the SSL cert that I just created, and I switched on Force SSL and HTTP/2 Support. And I saved it.

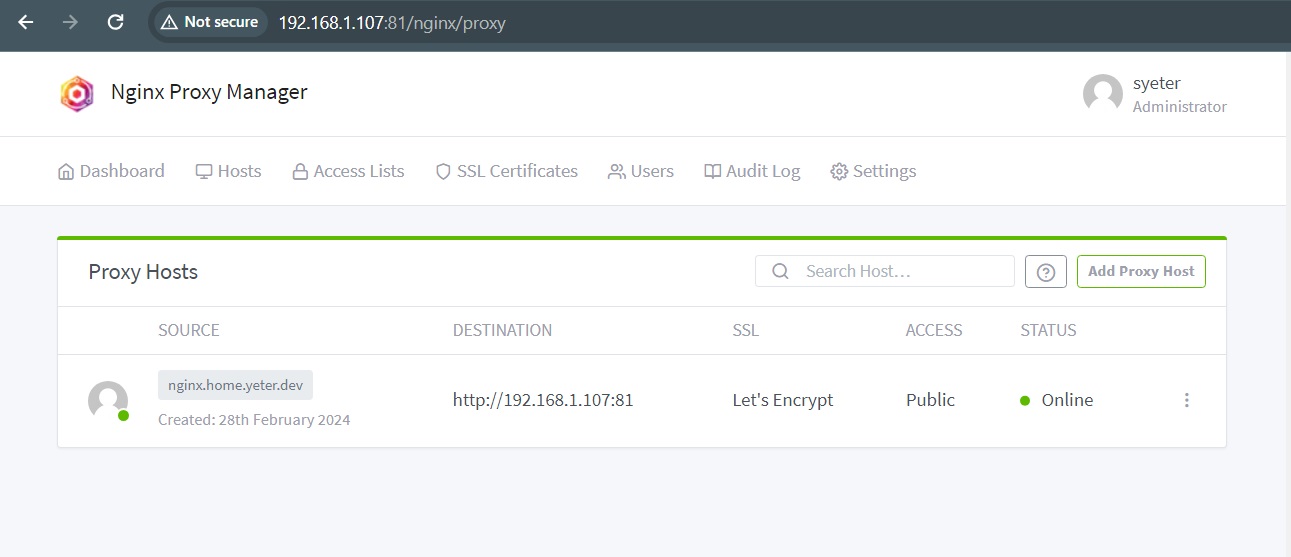
I can see my new proxy host here :
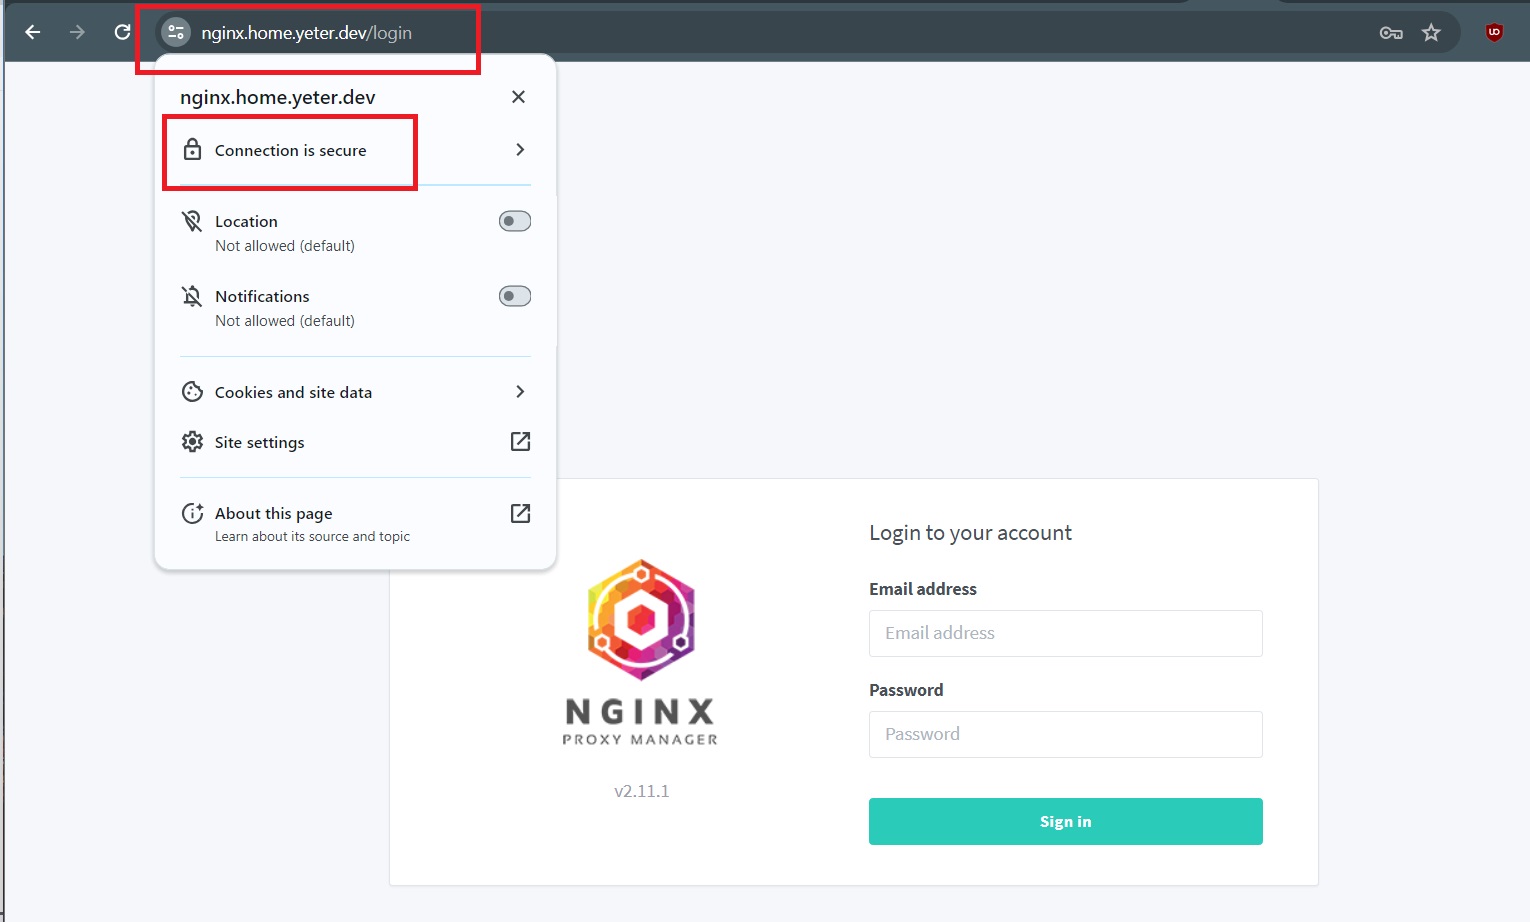
And here is https://nginx.home.yeter.dev/ with a secure connection:
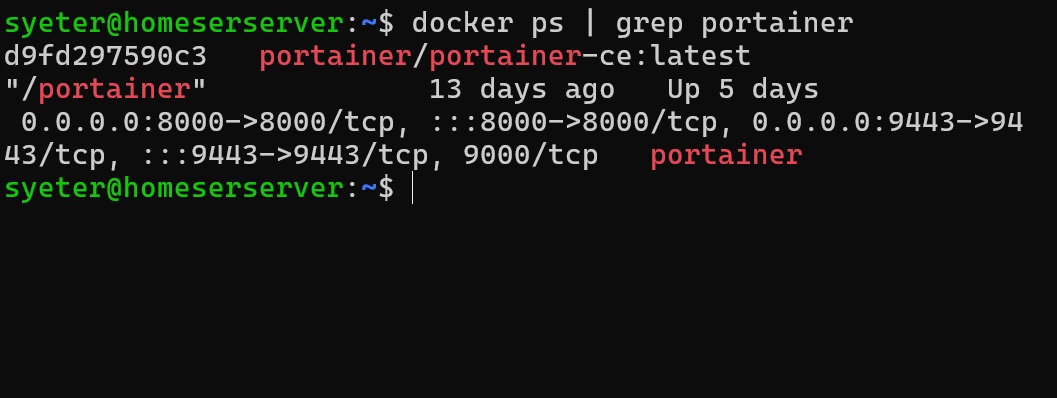
Let’s add one more host here. I ran a container for portainer as you can see here:
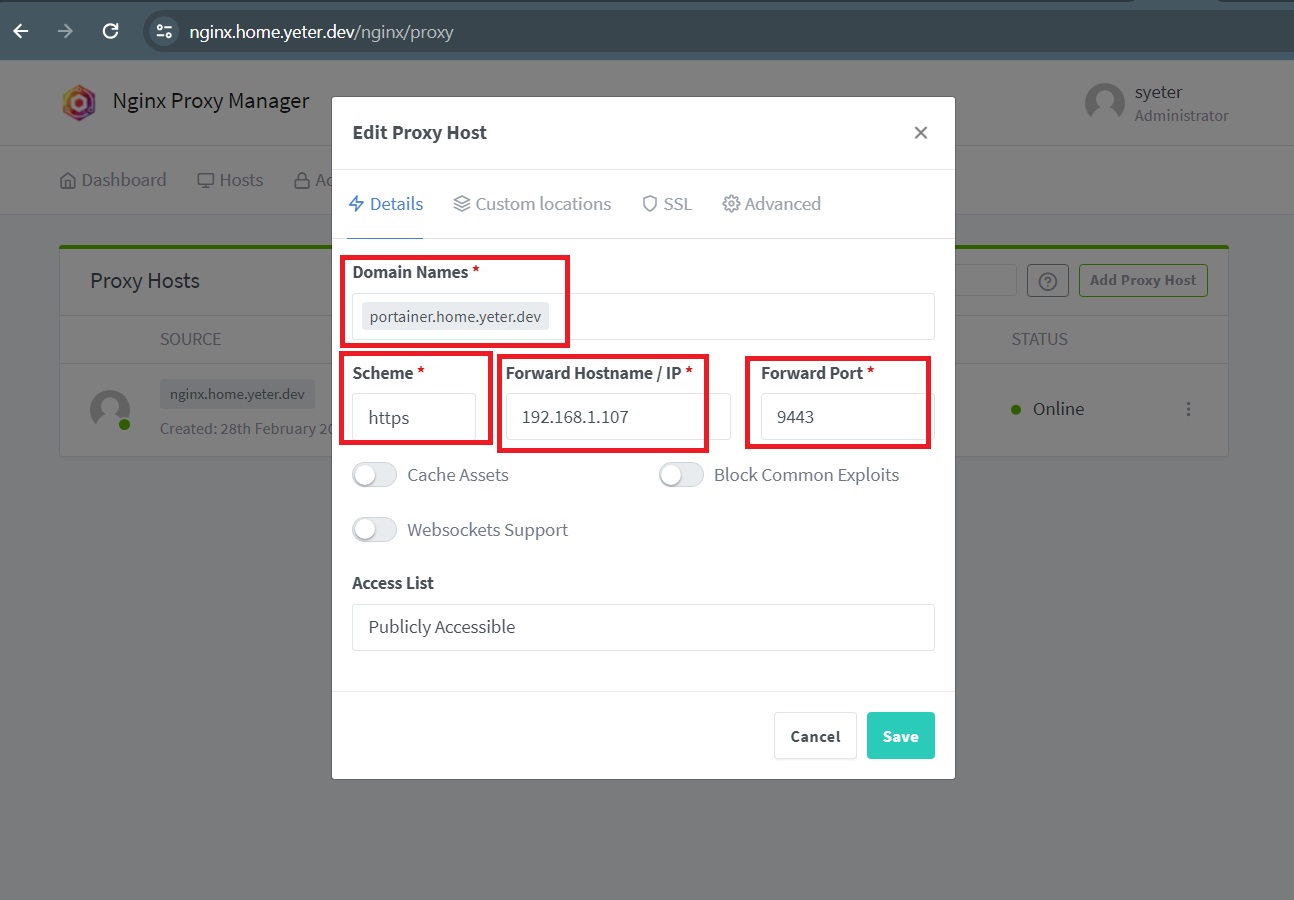
In the details tab, I added this domain name: portainer.home.yeter.dev.
The Scheme is https because the portainer uses HTTPS inside the docker container. I added my home server IP address: 192.168.1.107 and I added the port that the portainer uses.
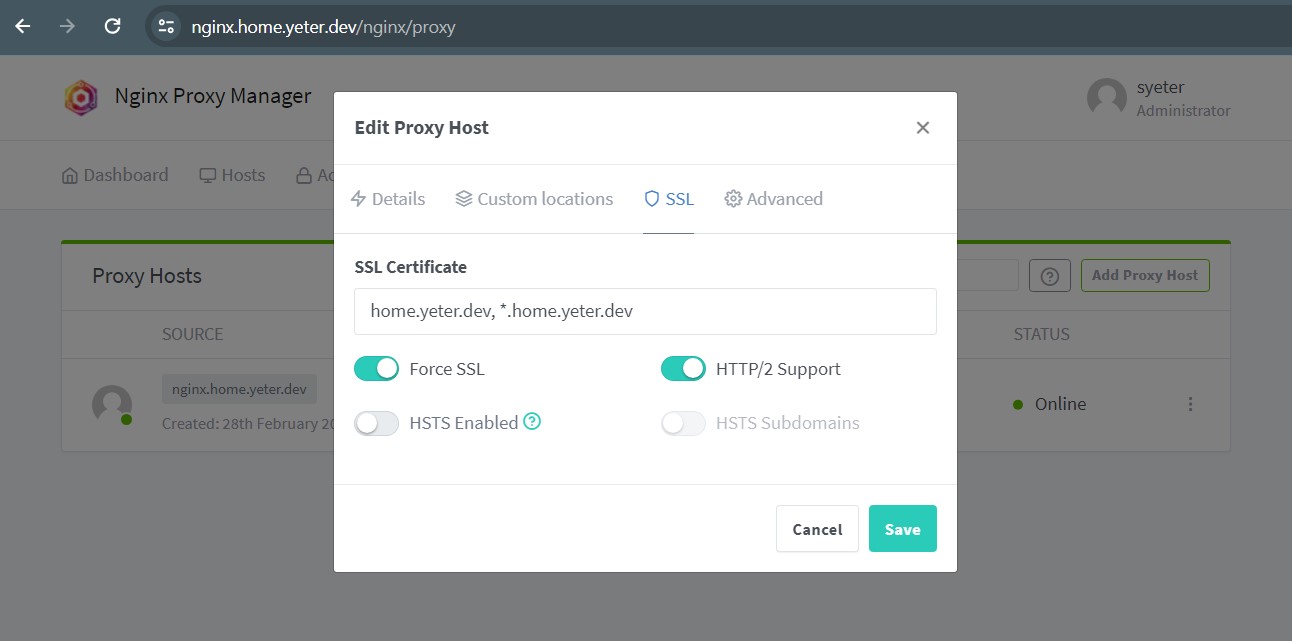
In the SSL tab, everything is the same.
And tada:
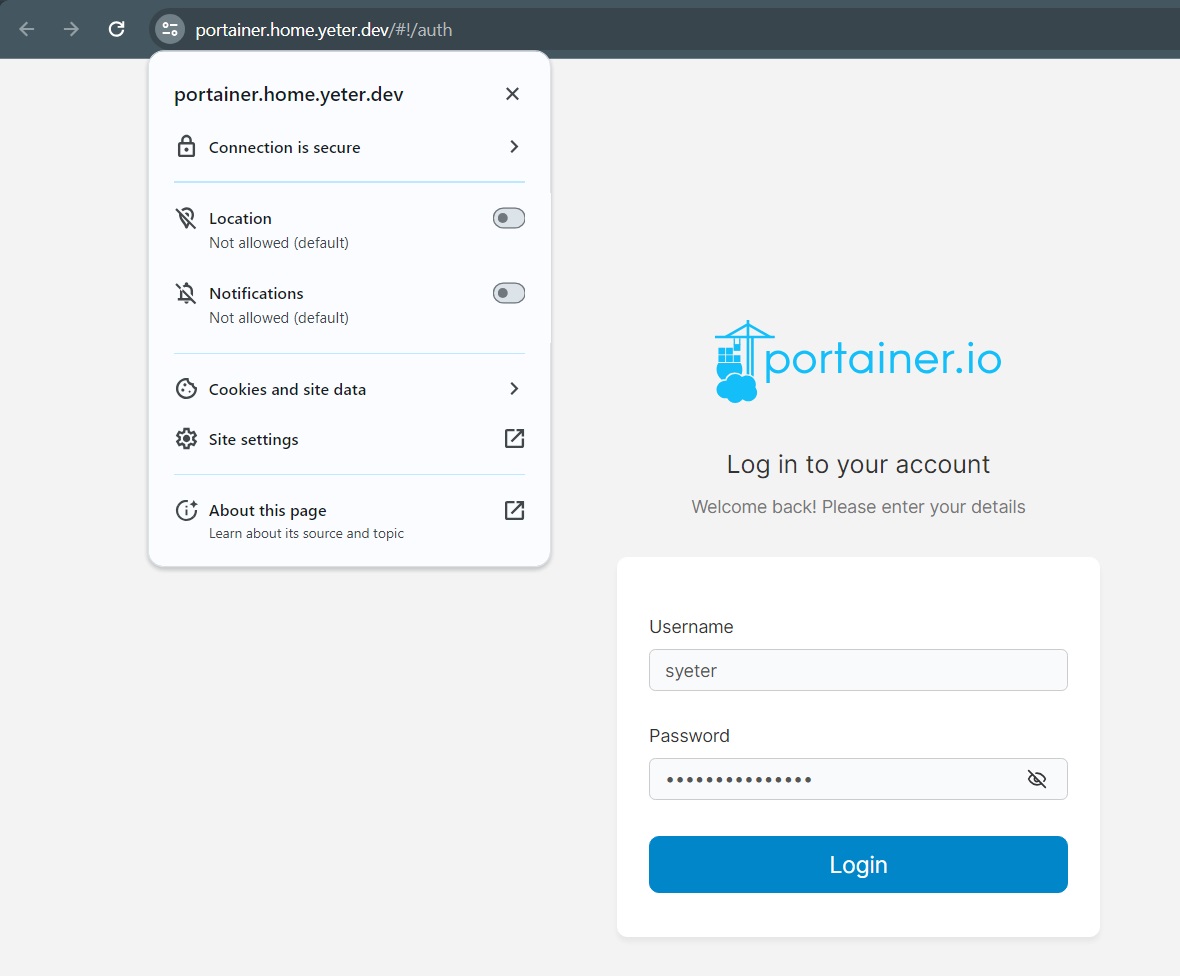
Now, I can run any app with or without docker, and I can assign any domain names to that app.
Most importantly, every device that is connected to my home network, can visit those apps with a secure connection.
A video on YouTube helped me to configure the Nginx Proxy Manager. It may help you as well. You can watch it here
I hope it is helpful and fun to read. Thank you for reading.
Said